Hi Guys!
I have been dying to get my hands on some of this stuff. I've heard about it for so long but never had:
1. the money (I thought, because you know I've spent $$ on stuff I could have otherwise been spending on this delicious paint) because at about $38 a quart, I was always too terrified guilty to buy it. Not to mention the wax, brushes, etc...
2. the courage, because it looked way too involved with all those steps, and what the heck is "waxing" over paint, anyway...?
3. the projects. I have bought several wonderful pieces for WAY to little money at our local small town flea market, antique store, and second hand store. Yes, I said "little". I must be doing everything right, because wait until you see what I have, but that's for another post...It's just one more reason I love my little country town...
Anyway, last week we were in one of our absolute favorite places, Historic Down Town St. Charles (Missouri), to have lunch and as we left the cafe a little shop right across the street caught my eye. Toodaloo is a shop that specializes in repurposed furniture and lovely vintage and handmade finds. They also happen to be a stockist of Annie Sloan Chalk Paint® (ASCP). We had been in there before, and I browsed the chalk paint but was too shy to buy. This time I walked in with purpose. After talking to the lovely lady covered in paint (she was painting a large and beautiful dining table) I decided upon a can of "Old White", the most versatile of colors. I had already purchased some Minwax at Lowe's for other projects, so I thought that would be fine, and I didn't buy any brushes, either. I wanted to experiment first.
So, I left with my purchase, it was about $42, tax included, and we headed for home.
I knew what I wanted to do first, just to get a feel for the paint. I have a bunch of these resin candle sticks. I've had them for years, purchased in a group. I have 5 left, one fell and broke. I also got all of my mother's home decor after she passed, and she had a few of these in a light brushed gold color. I didn't get a picture of the two I actually painted because I literally just jumped right in as soon as I got home right there on my stove, but this is the exact color that they were; same group.

Look at all that detail! I was so excited to get started... So excited that I forgot to show a few pictures of how I painted these. Maybe it's time I jump on the "YouTube" bandwagon. I painted these last week before I watched any tutorials. But after I painted the first one (with the WAY wrong brush) I searched out some tutorials. I found this great series from Blue Egg Brown Nest writer Christen Bensten on YouTube. I'm so glad I found this tutorial series (there are 5 videos in all for this tutorial on how she painted a dresser with ASCP) because I needed the instruction!

These are my candle sticks all painted up. The one on the right I painted with a sponge brush. *Sigh*...Don't do this. Just. Don't. Okay, it wasn't horrible because, as you can see, I got it painted, mostly. But, this paint dries fast. On your project; on your brush. But, if you've ever painted anything with a sponge brush before, you know the texture it leaves, and, with this pant, that's fine; you really kind of want a little texture, unless you want smooth, then you might want a different paint altogether ;) Anyway, the problem was that the sponge removes too much paint as you go. It doesn't leave what you want behind.
So, I watched a tutorial. Saw this big, fluffy, round, juicy brush being used...on a dresser. I'm doing candle sticks. That wouldn't work, even if I had one. But--I have a slew of paint brushes in my craft room, craft maven that I am ;)

There's my wicked little sponge brush...and my cheap little savior; the cheapest you can find. It came in a pack of multiple paint brushes, all different sizes and styles from Michael's or Hobby Lobby. You know the ones? Well, it worked just fine, for what I needed, but it shed like crazy. Last night I discovered another tutorial that I also found so helpful. Even though Christen (Blue Egg Brown Nest) said you could use a cheap brush from Home Depot, this second tutorial helped convince me with my "Yeeahhh, but...you've been doing this a long time, you could probably use any brush" mentality. Sort of a second opinion, if you will. You should check out her newly budding blog and her very informative and easy to follow YouTube tutorials. Her name is Christina--I just noticed both my little "inspirations" names are so similar and the same as one of my besties, too, lol--and her blog is Pretty Distressed. Her newest post was one of those "synchronistic" moments I'm always talking about. Anyway, you should check out her tutorials either here or on her YouTube. You won't be disappointed.
Okay, props given.
Next, I went into the "place-which-should-not-be-named"...the basement. I don't like our basement. Our house is 116 years old. It's dark, it's damp, the
But, down I went. I needed the wax and sandpaper. One thing that basement is? Organized. Thanks, Babe!
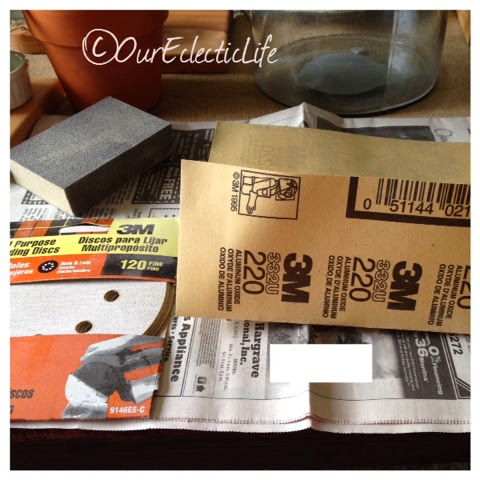
I grabbed a variety of what I thought I needed out of the "Sandpaper Drawer". A universal type sanding block that I could not find the grit # of on the packaging, a sheet of 220 grit sand paper, and I just grabbed some 120 sanding discs, just in case, because I didn't want to go back down there. I ended up using the sanding block and tore two little 2x2" pieces from the 220 paper for the little detail work.
I started out testing a few spots with the 220. It wasn't really strong enough. So I broke right into the sanding block. That did the trick, but I used a light hand, until I got the 'feel' for it. Then, for the smaller details, I used the little bits of 220. This will vary for each of your projects depending on how many coats you put on, how thick or textured you paint it and how distressed you actually want your piece. There will be some pieces I'll do that I won't want a lot of distressing on, so I'll either go very lightly on it or maybe not at all. There is no wrong way. Apparently you can just paint right over all of your mistakes, even after waxing. That's why Annie Sloan is an absolute genius in my eyes and my newest Hero.
Sand away until it feels right to you. I was doing such a small project, so I didn't wear a mask, but for more sanding, I just might. It doesn't create a lot of dust, but this paint is literally like chalk. Annie Sloan invented this in 1990, so it came way before chalk BOARD paint-not the same thing-so it is super soft and is just like shavings from an actual piece of white chalk. One thing to be careful of is your fingernails, if you have them. Watch that you don't scrape any of the surface with a nail as you are curving around with your sandpaper. I sanded on my dining room table over a news paper into a little bowl. The dust was heavy enough to fall right in. I also used the natural bristle brush I painted with to dust my piece as I went along (after I washed and dried it, of course).


Here are a couple detail shots of just how heavy or light you can go with your sanding. You can just nick away some of the paint so that only a little of the bottom color shows through, or go a little harder to get all the way down to the wood.

There are so many techniques to this, you really do have full creative control. Some will wax before sanding to take away less paint, some use the dark wax to distress a little more. I didn't have dark wax and was really just getting a feel for what I like, so these are the steps I used. Again, there's really no real 'right or wrong' from what I've gathered, so far, but I'm still learning...

When I was satisfied with the sanding, it was time to wax. I was a little scared, but getting braver all the while. After I watched the tutorials (that I linked for you above) and learned the ins and outs of the waxing process, I remembered I had these Martha Stewart stencil brushes. I bought them to stencil some pillows, but didn't really like the effect I was getting. Now that is something a sponge brush is good for. I went up and pick the two that I thought would work the best. There are several sizes in the pack of 6 or 7 brushes.

I opened my Minwax and discovered that, not only did it have a smell, it had a 'tint'. Not clear like Annie Sloan's. I was told by the clerk at Toodaloo's that the wax should be like Crisco. This was a bit harder than that...at first. But you know what? My brush rubbed around in it just fine. It was definitely soft enough. I just circled my brush around in it and wiped the excess off onto the side of the can from the side and 'bottom' of my brush.

I just started on the top of the candle holder, where the candle would sit, and circled the wax in. It went on exactly as the girls said it would. Though I could tell it was ever so slightly tinted, it didn't detract from the piece. I will be getting the AS Clear Wax very soon, though. I have some major projects coming up!

I would brush the wax in to an entire section, like the whole top, then buff it in with a rag. This is definitely where the elbow grease comes in. Even for this small project, it was a workout. I used a terry washcloth and that seemed to work just fine, but I'll use something softer next time. I am quite impatient and just wanted to grab what I had.

It worked out well because I was left with exactly what I was promised.

I finished both pieces, buffed them very well, and put them out. With a bigger project, you will want to let your wax 'cure' for at least a day, but I found these to be hardened and there were no sticky or 'rubby' spots on it after a few minutes. The finish is hard as a rock.


Here are a few pictures of them incorporated into my decor. I just made those little felt flowers for the candles a few weeks ago. There'll be a post about those soon, so keep an eye out!


Wouldn't Annie Sloan Paint have been great on this Painted Photo Block project from a couple of weeks ago? I totally think so, too. The things we wish we would have known...


I had so much fun experimenting with this lovely new product. I absolutely can not wait to get going on some bigger pieces. I will give you a little sneak-peek of what I will be working on real soon...

I can't wait! Until next time, go check out those great blogs I linked up top and let me know what you thought about this post right down below there in the comment box...I'd love to hear from you!
Have a great weekend and Father's Day! Spend some time with the daddy's in your life making memories. That is the most important thing in life...
Thanks for reading,
Nanette
No comments:
Post a Comment